

Setting up a canopy tent is a straightforward process that ensures shade and protection for outdoor events. It requires basic tools and careful assembly to guarantee stability and safety. Proper setup ensures the tent withstands various weather conditions‚ providing a durable shelter solution for gatherings‚ markets‚ or recreational activities. Understanding the steps and components is essential for a successful installation. Always follow the manufacturer’s instructions for optimal results.
Understanding the Basics of Canopy Tents
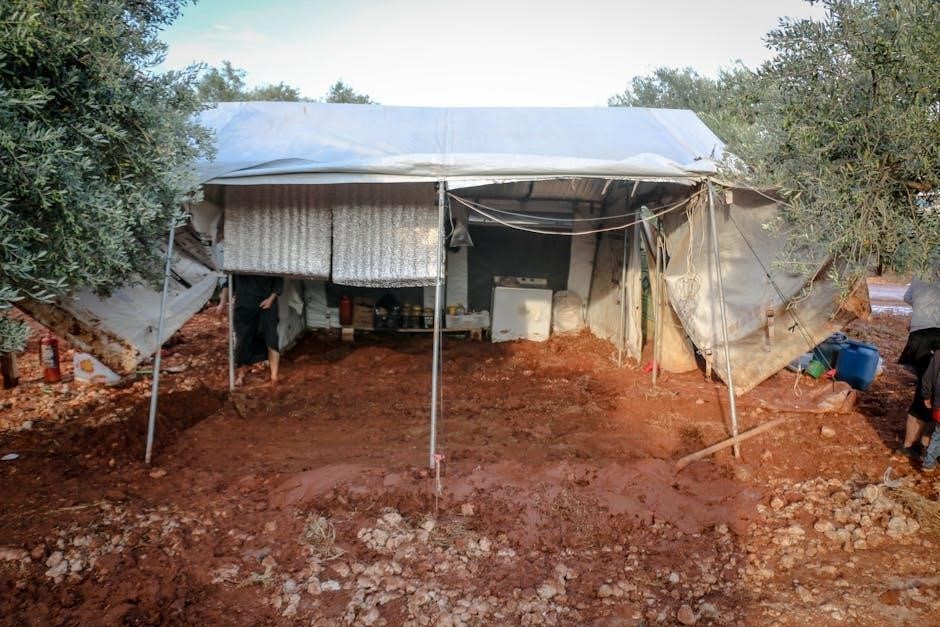
A canopy tent consists of a collapsible frame and a durable fabric top‚ designed to provide shade and shelter for outdoor events. The frame typically includes collapsible legs‚ roof poles‚ and connectors‚ while the canopy is made of water-resistant materials. Setup involves expanding the frame‚ draping the canopy over it‚ and securing it with hooks or Velcro. Proper installation ensures stability and safety‚ especially in windy conditions. Tools like Allen wrenches or pull ropes are often required. Understanding the structure and components is crucial for a smooth setup process‚ ensuring the tent remains sturdy and functional for its intended use.
Importance of Proper Setup
Proper setup of a canopy tent is crucial for safety‚ durability‚ and functionality. A well-assembled tent ensures stability‚ preventing collapse under wind or rain. Secure connections between the frame and canopy prevent sagging‚ while tight fastening reduces the risk of damage. Misaligned or loosely attached parts can lead to structural failure‚ posing hazards to people and property. Additionally‚ proper setup extends the lifespan of the tent by preventing wear and tear. Following the manufacturer’s instructions and double-checking each step ensures a safe and reliable shelter for any outdoor event‚ providing peace of mind for users and ensuring optimal performance in various conditions.
Essential Tools and Materials Needed
Setting up a canopy tent requires specific tools and materials to ensure a secure and proper assembly. Key items include a hammer for driving stakes‚ a screwdriver for tightening bolts‚ and a wrench for adjusting frame connections. Additional materials like ropes‚ stakes‚ and weight bags are necessary for anchoring the tent firmly to the ground. A tape measure can help verify the frame’s correct dimensions‚ while a ladder may be needed for taller structures. Tarps or ground covers can protect the area beneath the tent. Having all these tools and materials ready ensures a smooth and efficient setup process‚ minimizing delays and potential issues during assembly.

Preparation for Canopy Tent Assembly
Preparation is crucial for a smooth canopy tent setup. Ensure a flat‚ stable surface‚ unpack and organize components‚ and review instructions to avoid missing parts or steps.

Unpacking and Organizing the Components
Begin by carefully unpacking the canopy tent from its storage bag or box. Lay out all components on a clean‚ flat surface to ensure nothing is damaged or missing. Separate the frame‚ canopy fabric‚ poles‚ connectors‚ stakes‚ and ropes. Refer to the instruction manual to identify each part and confirm the completeness of the package. Organize smaller hardware‚ such as screws and clips‚ in a container to prevent loss. This step ensures a systematic approach to assembly‚ reducing confusion and saving time. Double-check that all parts are accounted for before proceeding to the next step. Proper organization is key to a hassle-free setup process.
Understanding the Frame and Canopy Structure
The frame is the backbone of the canopy tent‚ typically made of durable materials like metal or fiberglass. It consists of legs‚ connectors‚ and a roof structure that provides support for the canopy fabric. The canopy itself is a waterproof or water-resistant fabric designed to stretch securely over the frame. Familiarize yourself with the frame’s collapsible or expandable mechanism‚ as this varies by model. Most frames are straight-legged or slant-legged‚ with the latter offering a sloped design for easier snow shedding. The canopy fabric usually features reinforced stitching‚ UV protection‚ and grommets or Velcro attachments to secure it tightly to the frame. Understanding these components ensures proper alignment and stability during setup.
Choosing the Right Location for Setup
Selecting a suitable location is crucial for safe and effective canopy tent installation. Ensure the area is flat‚ stable‚ and free from debris‚ rocks‚ and uneven ground. Avoid low-lying spots where water may collect during rain. Check for overhead obstacles like power lines or tree branches. A well-ventilated area is ideal to prevent moisture buildup and reduce wind resistance. If setting up on grass‚ ensure the ground is firm to prevent legs from sinking. For hard surfaces‚ use weights or sandbags for stability. Always verify local regulations or permissions required for setup. A clear‚ accessible space ensures a hassle-free assembly process and optimal performance of your canopy tent.
Laying Out the Tent Frame
Begin by laying out the tent frame on a clean‚ flat surface. Identify and separate the poles‚ connectors‚ and legs. Place the frame components in their respective positions‚ following the manufacturer’s instructions. Ensure all parts are accounted for and organized to avoid confusion. Start by positioning the center piece of the frame‚ then extend outward to the sides. Use the included diagrams or labels to guide the layout. Make sure the frame is aligned properly and symmetrical. If the frame has color-coded or labeled parts‚ match them accordingly. A well-organized layout ensures a smooth and efficient assembly process‚ saving time and reducing frustration.
Step-by-Step Canopy Tent Setup Instructions
Follow a systematic approach to assemble the tent‚ starting with the frame‚ then attaching the canopy‚ and securing it tightly. Use the provided instructions and tools for accuracy.

Expanding the Tent Frame
Begin by placing the tent frame on a flat‚ stable surface. Pull the legs apart gently to start expanding the frame. Ensure all joints and connectors are aligned properly. Slowly lift the frame upward while pushing outward on the legs to expand it fully. Check that each leg is extended to its maximum height and securely locked in place. Use the provided pins or clips to stabilize the frame. Make sure the frame stands upright and even. If the frame wobbles‚ adjust the legs to ensure balance. Once expanded‚ double-check all locking mechanisms to confirm they are tight and secure before proceeding to the next step.
Draping the Canopy Top Over the Frame
Once the frame is fully expanded and stable‚ carefully unfold the canopy top. Hold it by the edges and align the center of the canopy with the frame’s peak. Gently drape the fabric over the frame‚ ensuring it hangs evenly on all sides. Start by attaching the top corners to the frame’s highest points‚ then work your way down. Pull the fabric taut to eliminate wrinkles and ensure proper alignment. Use the provided straps or clips to secure the canopy to the frame‚ starting from the top and moving downward. Make sure the fabric is evenly spread and tightly fitted to maintain structural integrity and a professional appearance.
Attaching Canopy Corners to Frame Poles
After draping the canopy‚ align each corner of the fabric with the corresponding frame poles. Use the provided Velcro straps‚ clips‚ or hooks to secure the corners tightly. Ensure the fabric is pulled taut to avoid sagging and evenly distribute tension across the canopy. Start by attaching one corner‚ then move to the opposite side to maintain balance. Repeat this process for all four corners‚ making sure each is snug and properly aligned. Double-check the connections to ensure they are secure and won’t come loose in the wind. This step is crucial for maintaining the canopy’s structural integrity and ensuring a smooth‚ professional setup;
Securing the Canopy to the Frame
Once the canopy is draped over the frame‚ use the provided straps‚ buckles‚ or elastic cords to secure it tightly. Start by attaching the straps at the corners‚ ensuring they are evenly tightened to maintain tension. Use a ratchet or tightening tool to pull the straps firmly‚ preventing any slack. Check all sides to ensure the canopy is evenly secured and avoid over-tightening‚ which could damage the fabric. For added stability‚ tie down any loose edges or flaps using additional straps or ropes. Finally‚ walk around the tent to ensure the canopy is evenly taut and properly fastened to the frame.
Extending and Locking the Frame
Begin by extending the tent frame to its full height. Locate the telescoping legs and pull them upward‚ ensuring each section clicks securely into place. Once extended‚ use the locking pins or levers to secure the legs at the desired height. Repeat this process for all four legs to maintain even balance. After locking‚ gently rock the frame back and forth to ensure stability and confirm that all joints are tight. For added security‚ tighten any additional bolts or screws provided for the frame connections. Double-check that all legs are evenly extended and locked to prevent instability during use.

Additional Features and Customization
Enhance your canopy tent with sidewalls for added shelter‚ or customize it with lights‚ hooks‚ and other accessories to suit your preferences and functional needs perfectly.
Installing Optional Sidewalls
Attach sidewalls to your canopy tent for enhanced protection from wind‚ rain‚ or sun. Begin by aligning the sidewall with the tent frame‚ ensuring it matches the canopy’s dimensions. Secure the top edge of the sidewall to the frame using Velcro straps or clips provided. Tighten the sidewall by pulling it taut and fastening the bottom edges to the frame or ground with ropes or stakes. Ensure a snug fit to maintain structural integrity. For multiple sidewalls‚ repeat the process on adjacent sides‚ overlapping seams slightly for a seamless look. Double-check all connections to ensure stability and proper alignment before final use.
Adding Accessories (Lights‚ Hooks‚ etc.)
Enhance your canopy tent’s functionality and aesthetic appeal by adding accessories like lights‚ hooks‚ or shelves. Start by identifying suitable locations on the frame for installation‚ ensuring they won’t interfere with the tent’s structural integrity. For lights‚ string them along the frame or hang them from the canopy roof using hooks or clips. Attach hooks to the frame to store items like bags or tools. If using shelves‚ secure them firmly to the frame to prevent sagging. Always follow the manufacturer’s guidelines for weight limits and installation methods. Double-check all connections to ensure stability and safety. These additions can elevate your canopy tent’s versatility for various events or everyday use.
Maintenance and Storage
Regular cleaning and proper storage extend the canopy tent’s lifespan. Always inspect for damage and store in a dry‚ secure location. Seasonal maintenance ensures durability.
Cleaning the Canopy and Frame
Cleaning the canopy and frame regularly ensures longevity and prevents damage. Start by brushing off loose dirt and debris using a soft-bristled brush. For tougher stains‚ mix mild soap with warm water and gently scrub the fabric with a sponge or cloth. Avoid harsh chemicals or abrasive cleaners‚ as they may damage the material. Rinse thoroughly with clean water and allow the canopy to air dry completely to prevent mildew. For the frame‚ wipe down metal parts with a damp cloth and dry immediately to prevent rust. Regular cleaning maintains the tent’s appearance and functionality‚ ensuring it remains in great condition for future use.
Proper Storage Techniques
Proper storage is essential to maintain the condition and longevity of your canopy tent. Always ensure the tent is completely dry before storing to prevent mold and mildew. Disassemble the tent and store each part separately in labeled bags to avoid loss or damage. Use a sturdy storage bag or container to protect the tent from dust and pests. Store the bag in a cool‚ dry place‚ away from direct sunlight and extreme temperatures. Avoid folding the canopy excessively‚ as this can cause creases or tears. Regularly inspect stored components for signs of wear or damage. Proper storage ensures your canopy tent remains in excellent condition for future use.

Troubleshooting Common Issues
Identify and address common canopy tent issues‚ such as sagging canopies or unstable frames‚ by tightening connections and ensuring proper weight distribution. Regular inspections help prevent problems.
Fixing a Sagging Canopy
A sagging canopy can compromise the structural integrity of your tent. To fix this‚ start by checking all connections and tightening any loose bolts or screws. Ensure the frame is evenly weighted and adjust the legs if necessary. If the issue persists‚ inspect the canopy fabric for tears or damage. Use a repair kit to patch any holes‚ then reattach the canopy securely to the frame. Make sure the fabric is taut and evenly spread to prevent further sagging. Regularly tightening hardware and maintaining proper tension will help avoid this problem in the future.
Addressing Frame Stability Problems
Frame stability issues can arise due to loose connections or uneven ground. Start by tightening all bolts and screws to ensure the frame is secure. Check the legs for equal height and adjust them to balance the structure. If instability persists‚ inspect for bent or damaged poles and replace them if necessary. Use weights or sandbags to stabilize the legs on hard surfaces. For soft ground‚ ensure stakes are deeply anchored. Regularly inspect the frame for wear and tear. Addressing these issues promptly will prevent collapse and ensure safe use of the canopy tent in various conditions.
Safety Tips and Precautions
Always check the weather before setting up and avoid use in strong winds or lightning. Ensure the frame is stable and anchored securely. Keep flammable materials away and supervise children. Regularly inspect the tent for damage and follow the manufacturer’s guidelines to ensure safe usage and longevity.
Ensuring Structural Stability
To ensure your canopy tent remains structurally sound‚ always anchor it securely using stakes‚ weights‚ or sandbags. Tighten all frame connections and hinges properly. Use leg weights or sandbags on soft ground for added stability. Avoid over-tightening‚ as this can damage the frame. Regularly inspect the tent for damage‚ especially after storage or transport. Ensure the ground is level and firm before setup to prevent uneven weight distribution. Never skip the step of securing the canopy top tightly to the frame to avoid sagging or detachment. Properly extend and lock all frame sections to maintain structural integrity. Stability is key to safety and longevity.
Weather-Related Safety Measures
Always check the weather forecast before setting up your canopy tent. Avoid installation in strong winds‚ as this can cause structural failure. If windy conditions arise‚ secure the tent with additional stakes and weights. In rainy weather‚ ensure the canopy is angled to allow water runoff and avoid pooling. Use a waterproof canopy to prevent leaks. In snowy conditions‚ clear snow from the roof regularly to prevent collapse. For sunny days‚ consider UV-resistant canopies and provide shade. Regularly inspect the tent for weather-related damage. Store the tent during extreme weather to prolong its lifespan. Ensure safety by monitoring weather changes and taking preventive measures.
With proper setup and care‚ your canopy tent is ready for safe and enjoyable use. Final checks ensure stability‚ securing a perfect outdoor experience;

Final Check Before Use
Before using your canopy tent‚ conduct a thorough inspection to ensure everything is secure and properly set up. Check all frame connections‚ canopy attachments‚ and corner ties for tightness. Verify that the frame is fully expanded and locked‚ and the canopy is evenly spread without sagging. Inspect the tent for any damage or wear. Ensure all weights‚ stakes‚ or sandbags are correctly positioned for stability. Double-check that all optional sidewalls and accessories are securely attached. This final review ensures safety and prevents potential issues during use. Once confirmed‚ you can confidently enjoy your canopy tent for your event or gathering.
Enjoying Your Canopy Tent
Once your canopy tent is set up and inspected‚ it’s time to enjoy the benefits it provides. Whether for outdoor events‚ picnics‚ or market stalls‚ a well-installed canopy offers reliable shelter and shade. Use it to create a comfortable space for guests or protect items from the elements. Consider adding decorative elements like lights or themed accessories to enhance its appeal. Properly anchored and maintained‚ your canopy tent will serve as a versatile and functional addition to any outdoor setting‚ ensuring memorable experiences and practical use for years to come. Its durability and ease of setup make it a valuable asset for various activities and gatherings.